Analog Input, or “Sleepy cats on mats”

The Analog input lab! In which we put the cat’s weight in, and receive cats sitting on mats or not sitting on mats back out.
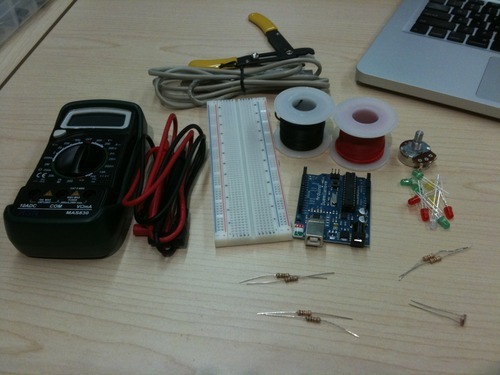
First, gathering all the ingredients:
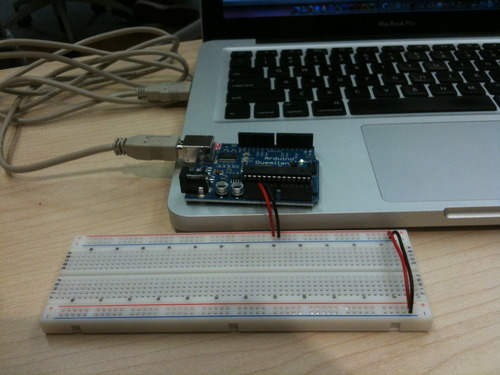
Next, hooking up the breadboard to 5-Volt power output on the Arduino… I also connected both of the power and ground rails on the opposite sides of the breadboard, just to make our breadboard more flexible.
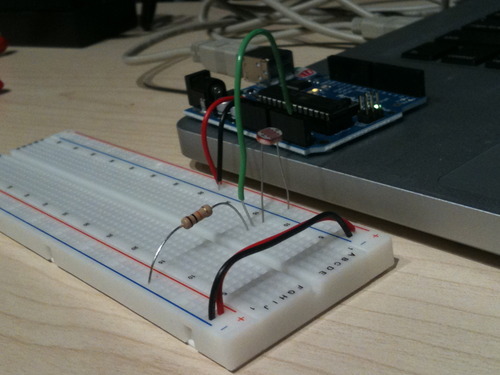
Next, hooking up our potentiometer. The red and black wires connect to the power coming out of the Arduino and ground going back in (respectively). The green wire carries voltage that has been varied by turning the potentiometer knob, and feeds that voltage into one of the Arduino’s analog-in pin.
Finally, I hooked up an LED to a digital-out pin on the Arduino so we can control its apparent brightness with the potentiometer. The output is digital in this case because this particular device (LED) can either be on (fully lit), or off (not lit)—it cannot be somewhere in between. But we can vary the appearance of its brightness using Pulse-Width Modulation, in which the LED blinks rapidly at varying intervals and speeds to give the illusion of being dimmer or brighter.
This video here shows what happens when you twist the knob.
The serial output on my screen showed numbers that vary between 0 (pot knob all the way turned to the left) and 1023 (all the way turned to the right). This is because digital output is limited to 10-bits (2^10).
Next, I replaced the potentiometer with a voltage divider circuit comprised of a fixed resistor and a photoresistor which provides variable resistance based on how much light is shining on it.
The serial output for photoresistor ranged from ~20 (cupping both hands around the photoresistor) to ~850 (all lights on in the room). This is with the 1k Ohm resistor.
Switching to 10k Ohm resistor, the range is from 0 to 56 (much smaller). Therefore it is necessary to choose the correct resistor so you get the widest usable range.
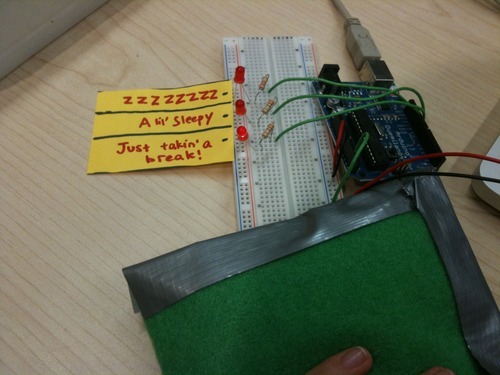
For the final part of this lab, I created an interactive pillow to measure sleepiness. This is extremely unscientific and results will vary based on the particular person’s body weight, but I had it calibrated to myself as I was feeling particularly sleepy that day.
Inside the pillow is a pressure sensor providing analog input to the Arduino…
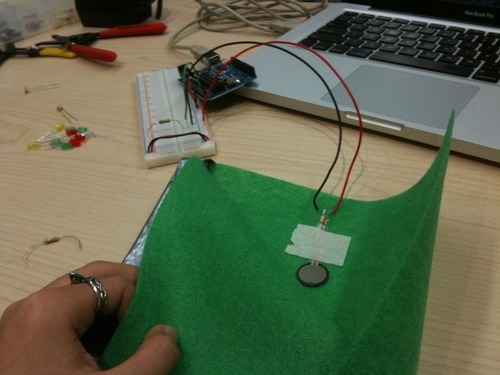
And on the breadboard are three LEDs that light up to indicate how much weight you are putting on the pillow: